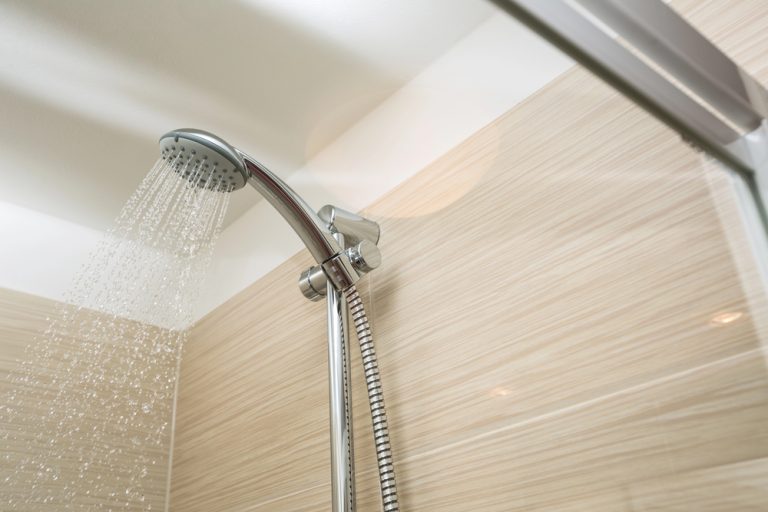
A leaking shower head may seem like a small plumbing issue, but over time it can waste hundreds of gallons of water, increase utility bills, and cause hidden damage to your bathroom walls and fixtures. Whether your shower head drips constantly, sprays unevenly, or leaks after you turn the handle off, understanding the root cause is essential. In this detailed guide by Home Fix Services.uswe explain why a leaking shower head happens, how to fix it step by step, when DIY repairs are enough, and when professional plumbing is the safest option.
This blog is designed to help homeowners make informed decisions while protecting their bathroom from long-term water damage.
Identify the Cause of a Leaking Shower Head
Before attempting any repair, it’s important to understand what is causing your leaking shower head. Different problems require different solutions, and misdiagnosing the issue can lead to repeat leaks.
Worn-Out Washer or O-Ring Causing a Leaking Shower Head
One of the most common causes of a leaking shower head is a damaged rubber washer or O-ring inside the connection. Over time, these small components wear down due to constant water pressure and temperature changes. When they lose elasticity, water escapes through the joint, resulting in dripping even when the shower is turned off.
Loose Shower Head Connection
Sometimes, a leaking shower head is caused by nothing more than a loose threaded connection. Vibration from water flow or improper installation can cause the shower head to loosen slightly, allowing water to seep out around the threads.
Mineral Buildup from Hard Water
In many homes, especially areas with hard water, mineral deposits such as calcium and lime build up inside the shower head. This buildup blocks water flow, increases internal pressure, and eventually forces water out through weak points, causing a leaking shower head.
Faulty Shower Valve Behind the Wall
If your shower head continues to drip long after the water is turned off, the issue may not be the shower head itself. A faulty shower valve can allow water to pass through even when the handle is closed, leading to a persistent leak that appears at the shower head.
Cracked Shower Head or Pipe
Physical damage, corrosion, or freezing temperatures can cause cracks in the shower head or connected pipe. Even a hairline crack can result in a steady leak that worsens over time.
Tools and Materials You Will Need to Fix a Leaking Shower Head
Fixing a leaking shower head doesn’t usually require advanced tools, but having the right materials makes the job easier and prevents further damage.
Basic Tools for Leaking Shower Head Repair
An adjustable wrench is useful for loosening and tightening the shower head without damaging the finish. A screwdriver may be needed if the shower head has removable parts. Keeping a soft cloth nearby helps protect chrome or stainless-steel surfaces from scratches.
Replacement Parts for a Leaking Shower Head
Rubber washers and O-rings are inexpensive and readily available. If the shower head itself is damaged or heavily corroded, replacing it entirely may be the most efficient solution.
Cleaning Supplies for Mineral Buildup
White vinegar is highly effective for dissolving mineral deposits. An old toothbrush or soft brush helps clean small spray holes, while a towel can catch excess water during removal.
Step-by-Step Guide to Fixing a Leaking Shower Head
Following a structured approach ensures your repair is effective and long-lasting.
Turn Off the Water Supply Before Repair
Although most shower head repairs don’t require shutting off the main water supply, it’s safer to ensure the shower handle is fully turned off. For extra precaution, you may shut off the water at the bathroom isolation valve.
Remove the Leaking Shower Head Safely
Wrap a cloth around the shower arm and use an adjustable wrench to gently loosen the shower head. Turning counterclockwise usually removes it easily. Avoid excessive force, as this can damage the pipe inside the wall.
Inspect the Washer and O-Ring
Once removed, examine the washer and O-ring for cracks, flattening, or brittleness. These components are often the main reason a leaking shower head develops.
Clean Mineral Deposits Inside the Shower Head
Soak the shower head in white vinegar for 30–60 minutes to dissolve mineral buildup. Use a toothbrush to scrub away residue and rinse thoroughly with clean water.
Replace Damaged Parts Properly
Install new washers or O-rings of the same size. Ensure they sit properly in their grooves to create a watertight seal.
Apply Plumber’s Tape to Prevent Future Leaks
Wrap plumber’s tape clockwise around the shower arm threads two to three times. This improves sealing and reduces the chance of future leaks.
Reattach and Tighten the Shower Head
Screw the shower head back on by hand first, then gently tighten with a wrench. Do not overtighten, as this can damage threads and cause new leaks.
Test the Repair
Turn on the shower and observe closely. A properly repaired leaking shower head should have no dripping at the connection or spray face.
When to Call a Professional for a Leaking Shower Head
While many shower head leaks are DIY-friendly, some situations require professional expertise.
Leak Continues After Multiple Repairs
If you’ve replaced washers and tightened connections but the leaking shower head persists, the problem may be deeper within the plumbing system.
Water Dripping from Inside the Wall
Moisture stains, bubbling paint, or mold around the shower area can indicate a hidden pipe or valve leak. This type of issue should always be handled by a licensed plumber.
Low Water Pressure with a Leaking Shower Head
Inconsistent pressure combined with leaks may signal valve failure or pipe corrosion that requires specialized tools and knowledge.
Old or Corroded Plumbing System
In older homes, outdated pipes may not seal properly with modern fixtures. Professional assessment prevents further damage and costly repairs.
Signs of Mold or Structural Damage
Persistent moisture from a leaking shower head can lead to mold growth and weaken wall structures. Early professional intervention saves money and protects health.
Prevent Further Damage from a Leaking Shower Head
Prevention is always more cost-effective than repair after damage occurs.
Regular Plumbing Inspections
Routine inspections identify early signs of wear before a leaking shower head becomes a major problem.
Upgrading Old Shower Fixtures
Modern shower heads are designed for efficiency, durability, and leak resistance. Upgrading reduces water waste and maintenance needs.
Professional Leak Detection
Advanced tools allow plumbers to detect hidden leaks without damaging walls or tiles.
Long-Term Cost Savings
Fixing a leaking shower head early prevents high water bills, mold remediation costs, and structural repairs.
Peace of Mind with Expert Service
Professional plumbing ensures repairs meet safety standards and last longer, giving homeowners confidence and comfort.
Final Thoughts on Fixing a Leaking Shower Head
A leaking shower head is more than an inconvenience—it’s a warning sign that should never be ignored. With proper diagnosis, basic tools, and timely action, many leaks can be fixed quickly. However, knowing when to call a professional can protect your home from serious water damage.

Leave a Reply