Your air conditioner is one of the hardest-working appliances in your home. During the summer months it runs for hours every single day — pulling warm air from your living spaces, cooling it down, and pushing it back through your home to maintain a comfortable temperature. Like any machine that works this hard, your AC system needs regular care and attention to perform at its best.
The problem is that most homeowners only think about their air conditioner when something goes wrong. They ignore it all winter, start it up in spring, and expect it to run perfectly through the hottest months of the year without any maintenance whatsoever. Sometimes that works — for a while. But eventually, neglect catches up with every AC system. Components wear out faster, efficiency drops, energy bills climb, and the system breaks down at the worst possible moment — usually on the hottest day of the year when every HVAC technician in town is booked solid.
The good news is that keeping your air conditioner running efficiently does not require advanced technical knowledge or expensive professional visits every few months. A consistent maintenance routine — built around a clear checklist of tasks — is all it takes to protect your system, extend its lifespan, reduce your energy bills, and ensure reliable cooling all summer long.
This guide gives you a complete AC maintenance checklist with 10 essential tips that every homeowner should follow. Some of these tasks take just a few minutes and cost nothing. Others benefit from professional attention once a year. Together they form a comprehensive routine that keeps your air conditioner running at peak efficiency season after season.
Replace Your Air Filter on a Regular Schedule
If there is one maintenance task on this entire list that has the greatest impact on your AC system’s efficiency and health, it is this one. Replacing your air filter on a regular schedule is the single most important thing a homeowner can do for their air conditioning system — and it is also the most frequently neglected.
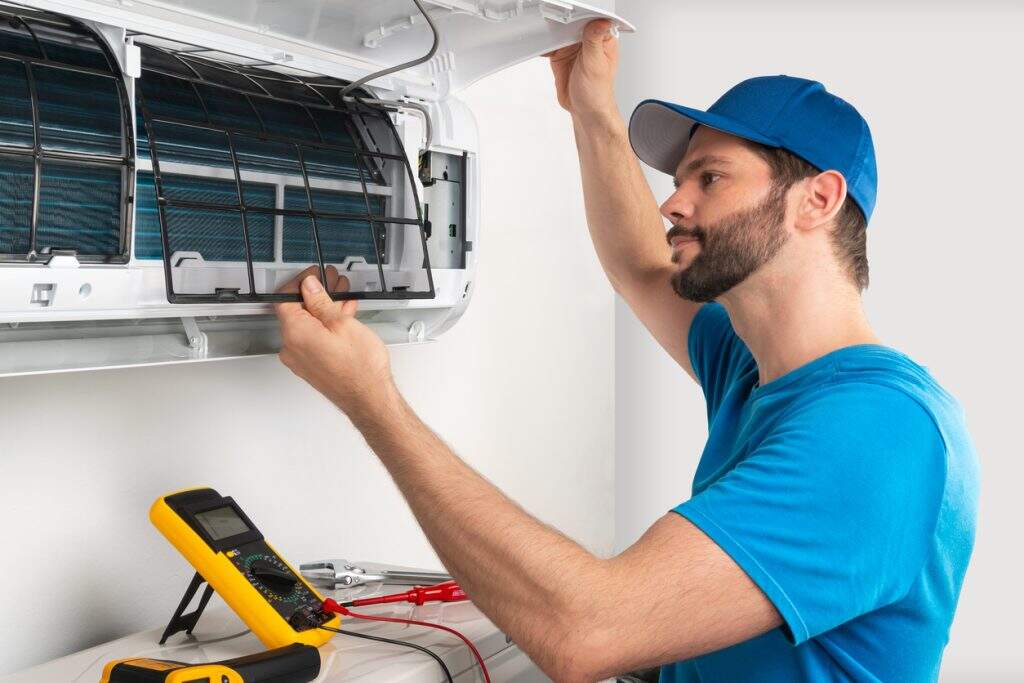
Your air filter sits at the point where air enters your AC system and traps dust, pollen, pet dander, mold spores, and other airborne particles before they can enter the system’s internal components. When the filter is clean, air flows through it easily. When it becomes clogged — and it will become clogged faster than most homeowners expect — it restricts airflow significantly.
Restricted airflow causes a cascade of problems throughout the system. The blower motor has to work harder to pull air through the clogged filter, consuming more electricity and wearing out faster. Without adequate airflow, the evaporator coil gets too cold and can freeze over — creating a layer of ice that blocks airflow entirely and stops the cooling process. Meanwhile, dust and debris that should have been caught by the filter pass through and accumulate on internal components, reducing efficiency further.
During summer when your AC is running almost constantly, check your filter every single month. If it looks grey or visibly clogged — replace it immediately. As a general rule, filters should be replaced every 30 to 60 days during peak cooling season. Homes with pets, smokers, or allergy sufferers should replace filters monthly without exception.
Keep a supply of the correct filter size on hand at all times so there is never a reason to delay. Air filters are inexpensive — the cost of replacing them on schedule is a fraction of the repair bills that result from running a system with a clogged filter.
Clean the Outdoor Condenser Unit
The outdoor condenser unit is your AC system’s workhorse. It is responsible for releasing the heat removed from your home into the outside air — and it does this job all day, every day during cooling season. For it to operate efficiently, it needs to be clean and have adequate airflow around it at all times.
Over the course of a season, the condenser unit collects an impressive amount of debris. Grass clippings from lawn mowing, cottonwood seeds, leaves, dust, and dirt all accumulate on the fins and coils of the unit. This buildup acts as insulation — preventing heat from escaping efficiently and forcing the system to work harder and consume more electricity to achieve the same cooling result.
Inspect your outdoor unit at least once a month during summer. Start by keeping the area around the unit clear — trim back any grass, weeds, shrubs, or plants that have grown within two feet of the unit on all sides. Good clearance ensures the unit has the airflow it needs to operate properly.
To clean the unit itself, start by turning off power at the disconnect box located near the unit. Remove any large debris — leaves, seeds, or clippings — from the top and sides by hand or with a soft brush. Then use a garden hose to gently rinse the fins from the inside out, working from the interior of the unit outward. This pushes debris out of the fins rather than deeper into them. Use a gentle stream — never a pressure washer — as high pressure bends and damages the delicate aluminum fins and reduces the unit’s ability to release heat.
If the fins are bent or heavily soiled, a professional cleaning and fin straightening during your annual tune-up will restore full efficiency.
Inspect and Clean the Evaporator Coil
While the condenser coil outside releases heat, the evaporator coil inside your air handler is where the actual cooling of your home’s air takes place. Refrigerant flows through the evaporator coil in a cold state, and warm air from your home passes over it — transferring its heat to the refrigerant and emerging cooler on the other side. This heat exchange process is the core of how your AC cools your home.
Over time, dust and debris that pass through the air filter accumulate on the surface of the evaporator coil. This layer of buildup acts as an insulating barrier between the warm air and the cold refrigerant — reducing the efficiency of heat transfer and forcing the system to run longer and consume more electricity to achieve the same cooling result. A heavily soiled evaporator coil can reduce system efficiency by 20 percent or more.
The evaporator coil is located inside the air handler cabinet and requires opening the unit to access. While homeowners can inspect the coil and remove light surface dust with a soft brush, a thorough cleaning is best handled by a professional HVAC technician during an annual tune-up. Technicians use specialized no-rinse coil cleaning solutions that break down buildup without damaging the coil or creating moisture issues inside the cabinet.
If you notice reduced cooling performance, higher than normal energy bills, or ice forming on the refrigerant lines, a dirty evaporator coil may be the cause. Do not delay addressing it — a frozen coil that continues to operate can damage the compressor, which is one of the most expensive components in the system.
Clear and Maintain the Condensate Drain Line
As your air conditioner cools your home’s air, it also removes humidity from it. This is one of the AC system’s most important functions — especially in humid climates where high moisture levels make warm air feel significantly hotter and more uncomfortable than it actually is.
The moisture removed from the air collects on the evaporator coil as condensation and drains away through the condensate drain line — typically a PVC pipe that routes water to a floor drain, utility sink, or outside. This drainage system works quietly in the background and most homeowners never give it a second thought — until it gets blocked.
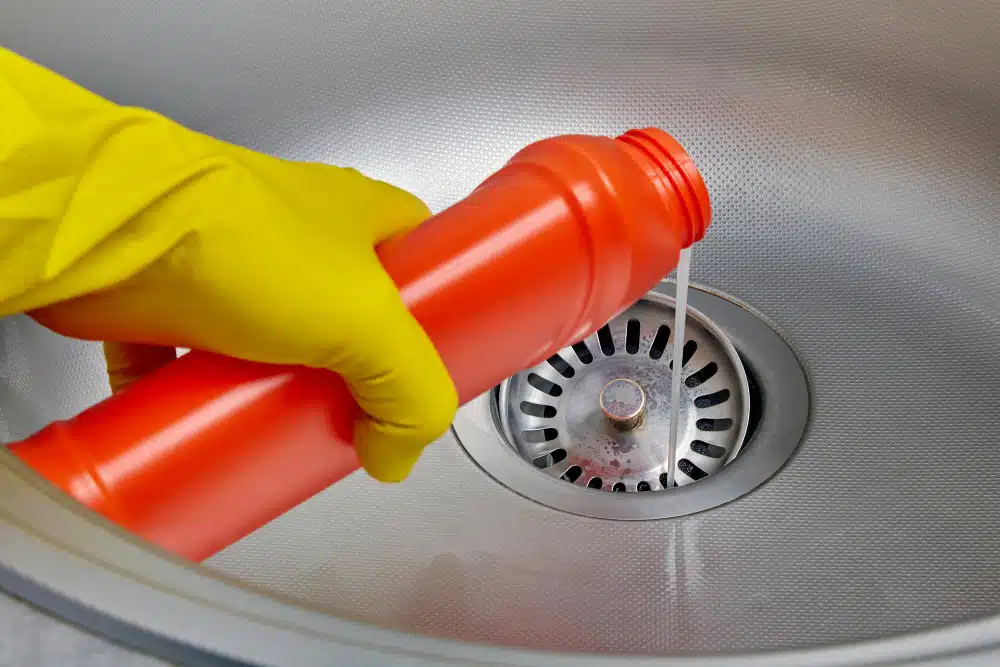
The condensate drain line is a dark, moist environment — ideal for algae, mold, and mildew growth. Over time this growth accumulates inside the line and gradually restricts water flow. Eventually the line blocks completely, causing condensate to back up into the drain pan. When the pan fills, water overflows — potentially causing water damage to your ceiling, walls, and flooring. Many modern AC systems have a safety float switch that shuts the system down when the drain pan fills, preventing water damage but leaving you without cooling until the blockage is cleared.
Preventing condensate drain blockages is simple and takes just a few minutes. Every one to two months during cooling season, pour a cup of distilled white vinegar down the condensate drain line. The vinegar kills algae and mold before they can accumulate into a blockage. Some homeowners use a mixture of warm water and a small amount of bleach for the same purpose — either approach is effective.
If you notice water pooling near your indoor unit, musty odors coming from your vents, or your system shutting off unexpectedly, a blocked condensate line is the likely cause. A professional can clear the blockage quickly using a wet-dry vacuum or compressed air.
Check Refrigerant Levels
Refrigerant is the chemical compound that circulates through your AC system — absorbing heat from inside your home at the evaporator coil and releasing it outside at the condenser coil. The correct amount of refrigerant is essential for the system to operate efficiently. Too little refrigerant and the system cannot transfer heat effectively — resulting in poor cooling performance, warm air from vents, frozen coils, and significantly higher electricity consumption.
Unlike other consumable maintenance items, refrigerant does not get used up over time in a properly functioning system. It circulates in a closed loop indefinitely. If refrigerant levels are low, it means there is a leak somewhere in the system — and simply adding more refrigerant without finding and fixing the leak is a temporary solution that will require repeat service calls as levels continue to drop.
Checking and adjusting refrigerant levels requires specialized equipment and EPA certification — this is strictly a professional task. However, homeowners can watch for the warning signs of low refrigerant. These include warm or insufficiently cool air from vents, ice buildup on the refrigerant lines running between the indoor and outdoor units, a hissing or bubbling sound near the indoor unit indicating escaping refrigerant, and the system running continuously without reaching the set temperature.
If you notice any of these signs, call a licensed HVAC technician promptly. They will use manifold gauges to measure refrigerant pressure, identify whether levels are correct, locate and repair any leaks, and recharge the system to the manufacturer’s specified level. Addressing a refrigerant issue early prevents the compressor from operating under stress — which can lead to compressor failure and a much larger repair bill.
Inspect and Seal Your Ductwork
Your ductwork is the network of channels that distributes cooled air from your air handler to every room in your home. It is also one of the most commonly overlooked components in residential AC maintenance — and one of the most significant contributors to energy waste when it is not in good condition.
Research consistently shows that the average home loses 20 to 30 percent of conditioned air through leaky ductwork. That means up to 30 cents of every dollar you spend on cooling never actually reaches the rooms where you need it — instead escaping into attics, crawl spaces, and wall cavities. In homes with older ductwork or ducts routed through hot attic spaces, the losses can be even greater.
Signs of duct problems include uneven temperatures between rooms, noticeably weak airflow from certain vents, higher than expected energy bills, and excessive dust throughout the home. If some rooms are always warmer than others despite the AC running, duct issues are a likely contributing factor.
Inspect accessible ductwork — in basements, crawl spaces, or utility areas — for obvious gaps, disconnected sections, or damaged insulation. Small gaps can be sealed with metal foil tape or mastic sealant. Avoid using standard duct tape — it deteriorates quickly under the temperature extremes inside duct systems and does not provide a reliable long-term seal.
For a thorough assessment, a professional duct inspection using pressure testing equipment can identify the location and severity of leaks throughout the entire duct system — including sections that are not visually accessible. Properly sealed ductwork dramatically improves system efficiency and ensures the cooled air your system produces reaches every room in your home.
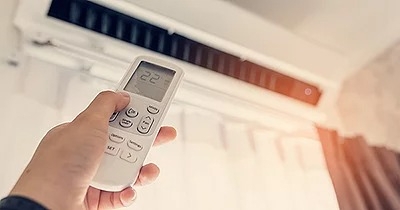
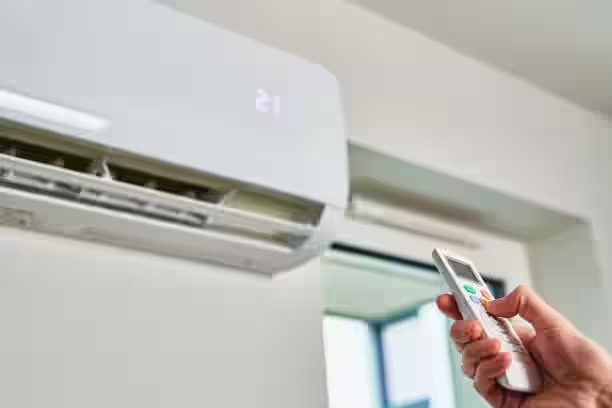
Test Your Thermostat for Accuracy
Your thermostat is the control center of your entire HVAC system. It reads the temperature of the air in your home and signals the AC to run when cooling is needed. When the thermostat is functioning correctly, your home stays at the temperature you set with minimal energy waste. When it is malfunctioning or inaccurate, the system may run more than necessary — or not enough — costing you money and comfort.
Testing your thermostat for accuracy is a simple task that most homeowners never do. Use an inexpensive standalone digital thermometer placed near the thermostat to compare its temperature reading with what the thermostat displays. If there is a consistent difference of more than a degree or two, the thermostat may need recalibration or replacement.
Also check that the thermostat is not being influenced by nearby heat sources — direct sunlight, lamps, televisions, or appliances near the thermostat cause it to read a higher temperature than the actual room temperature, causing the AC to run more than needed.
If you are using an older manual or basic programmable thermostat, this is an excellent time to consider upgrading to a smart thermostat. Smart thermostats provide more accurate temperature sensing, automated scheduling, remote access, and detailed energy usage data — all of which contribute to more efficient operation and lower energy bills.
Inspect Electrical Components and Connections
Your AC system contains numerous electrical components — capacitors, contactors, relays, wiring, and more — that work together to start and run the motors and compressor. Loose electrical connections, failing capacitors, and worn contactors are common causes of AC malfunctions and can lead to complete system failures if not addressed promptly.
Capacitors are small cylindrical components that provide the initial boost of electricity needed to start the compressor and fan motors, and continue to support their operation while running. Capacitors degrade over time and are one of the most commonly replaced components in residential AC systems. A failing capacitor may cause the compressor or fan motor to struggle to start, run intermittently, or fail completely.
Contactors are switches that control the flow of electricity to major components like the compressor. Over time, the contact surfaces pit and corrode, leading to intermittent operation or complete failure.
While homeowners should not attempt to work on electrical components themselves — high voltage capacitors can hold a dangerous charge even after the system is powered off — a professional technician can test all electrical components during an annual tune-up and replace any that are showing signs of degradation. Catching a failing capacitor before it causes a motor to burn out is the difference between a $50 repair and a $500 or more motor replacement.
Lubricate Moving Parts
Your AC system contains several moving parts — primarily fan motors and blower motors — that require lubrication to operate smoothly and efficiently. Without adequate lubrication, friction increases in motor bearings, causing them to wear faster, draw more electricity, and eventually fail.
Older AC systems used motors with oil ports that required annual lubrication with a few drops of lightweight machine oil. Most modern motors are sealed and permanently lubricated — but it is worth checking your system’s documentation or asking your technician whether any components in your specific system require periodic lubrication.
During an annual professional tune-up, a technician will inspect all moving parts, identify any components that require lubrication, and apply the appropriate lubricant to keep everything running smoothly and efficiently. This simple step extends the life of motors and bearings and prevents the increased energy consumption that results from friction in moving parts.
Schedule an Annual Professional AC Tune-Up
All nine of the maintenance tasks described above form an important part of your ongoing maintenance routine. But there are aspects of AC maintenance that go beyond what a homeowner can do independently — requiring professional equipment, technical expertise, and hands-on inspection of every system component. This is what a professional annual tune-up provides, and it is the cornerstone of any effective AC maintenance strategy.
During a comprehensive professional tune-up, a certified HVAC technician performs a thorough inspection and servicing of your entire system. This includes checking and adjusting refrigerant levels, cleaning evaporator and condenser coils, testing and tightening all electrical connections, testing and replacing failing capacitors and contactors, lubricating all moving parts, inspecting and clearing the condensate drain, calibrating the thermostat, measuring airflow throughout the system, and running a complete operational test to verify that every component is working within manufacturer specifications.
The ideal time to schedule your annual tune-up is in spring — before the demands of summer cooling season begin. A system that has been professionally serviced before summer starts is running at peak efficiency from the first hot day, rather than struggling through efficiency-robbing problems that quietly developed over winter.
Beyond immediate efficiency improvements, a professional tune-up often identifies developing problems — a low refrigerant level, a capacitor showing signs of weakness, a slightly dirty coil — before they escalate into failures. Addressing these issues proactively during a routine service visit is far less expensive than emergency repairs during the height of summer.
Homeowners who commit to annual professional tune-ups consistently experience lower energy bills, fewer unexpected breakdowns, and AC systems that last significantly longer than those that are neglected. It is the single most important investment you can make in the long-term health and performance of your air conditioning system.
Conclusion
A well-maintained air conditioner is more efficient, more reliable, and significantly less expensive to operate than a neglected one. The 10 maintenance tips in this checklist — from replacing air filters and cleaning the condenser unit to scheduling annual professional tune-ups — form a complete routine that protects your system, extends its lifespan, and keeps your home reliably comfortable through every summer.
The most important thing to understand about AC maintenance is that consistency matters more than perfection. Replacing your filter on schedule, keeping the outdoor unit clean, clearing the condensate drain, and scheduling your annual professional service are habits that compound over time — producing year after year of efficient, trouble-free cooling.
Do not wait for your AC to start blowing warm air or making strange noises before giving it attention. A proactive approach to maintenance is always less expensive, less stressful, and more effective than reactive repairs after something has already gone wrong.
Start working through this checklist today —“If maintenance tasks become difficult or you notice performance issues, seeking professional help can ensure your system continues to run efficiently.
Visit : homefixservices.us
Home Fix Services — Complete Home Solutions Under One Roof. Licensed, Insured & Ready to Help.

Leave a Reply